It includes the following new features:
- "Pong clock" (adapted to 16x24 display from Nick's version for 16x48 display);
- ability to set the date (year/month/day) and day-of-week from the buttons (the "old" way of setting the clock through the file time.txt on the SD card is still there);
- "Big clock", courtesy of Ruud;
- display the temperature (for Duino644+ boards using the DS3231 real time clock).
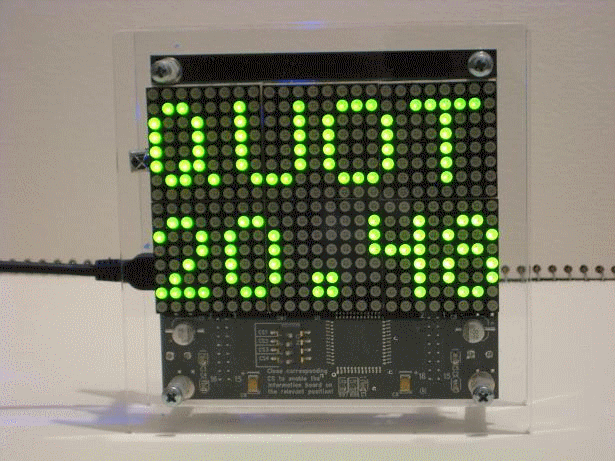
The following animation (click on the photo) shows all menu options (displayed by pressing the button "Menu").
The existing attempt to a "user manual" still has valid information, so please browse through that too.
The software was compiled with Arduino IDE 21. After downloading it, the file should be unzipped in the folder "arduino21/libraries/". It is confirmed that both WiseClock2 and WiseClock3 software cannot co-exist in the same "libraries" folder.
In order to build, you will need the Sanguino files. Please refer to this post on the environment setup for the build/upload.
The code can handle both the red and the green 24x16 LED displays from Sure Electronics. The current default setting is for the green display. If you have the red display, comment out this line
#define _GREEN_DISPLAY_
in file HT1632.cpp.
Regarding setting the date, this is performed through the "DATE" menu option. The bottom half will show the date in the format YYMMDD. Move between the three by pressing the "Set" (middle) button. The flickering number indicates the current selection that gets incremented by pressing the "Plus" button. Note that the year (first 2 digits) will rollback after 50, so if you accidentally passed the current year (11), you will need to go all the way to 50, then back to 0, then to 11 again.
The day-of-week can be set through the menu "DAY". After the menu was selected (button "Set", the middle one), scan through the days by pressing button "Plus".
To save the settings, wait for the menu to timeout (after about 4 seconds after the last button press).
The display of the temperature is enabled/disabled from the menu options "TMP+" / "TMP-" respectively.
Other nice-to-have features on the TODO list:
- indicate special dates (e.g. friends' or family birthdays, anniversaries, holidays);
- automatic daylight-saving-time adjustment;
- chime at top and bottom of the hour.
Related posts:


No comments:
Post a Comment